Get Used to Drawing Thin Lines in Digital Art
Yous may be trying to describe with a digital tool such as Mediban Paint and are having trouble getting your line drawings to expect good.
In lodge to draw a make clean line digitally
(1) Know the functions of the app, such every bit Milkshake Reduction, and accommodate it to suit your needs.
(2) Working with a larger image
(three) Exercise your "hands" on a daily basis then that you tin draw the line where yous desire information technology to be.
There are three bones methods.
(1) No thing how well y'all can draw lines on paper, if yous draw with a tablet pen, there will always exist milk shake.
Shake correction is essential to achieving clean lines.
(2) should always be done when drawing digitally.
When you work with a minor image, even if the image looks clear on the monitor, the jagged lines are clearly visible when you zoom in.
It is better to reduce the size of an enlarged cartoon (specially when printing) to get a better result.
For (3), you'll have to get used to manipulating the lines so that you tin depict the shape y'all desire.
Information technology's just a matter of practicing every twenty-four hours!
In this article, y'all tin can exercise all three of the above then that you lot can describe a clean line drawing.
How to use the Milk shake Correction function to describe clean lines
Techniques for making lines "look overnice
This department introduces the following.
1. [Shake Reduction] Adjusting the Pen Tool
There are several pens included in Mediban Pigment past default, simply there are generally iv that you can apply to depict "line drawings" in illustrations and cartoons.
From these, you tin can adjust the nibs to adapt your needs.
(1) Circular pen
(2) Pen
(3) Pen (insert)
(iv) One thousand Pen
ane-i. Select the pen tool
Only he or she can tell you which pen is right for you.
Hand habits are different for each person.
Choose a pen to draw your main lines with later a few drawings,
Can you describe a line that is close to the illustration or image yous want to draw?
Is your hand tired?
Is it easy to suit the intensity of the drawing? (Or is it likewise strong or too weak?)
etc.
If the line is a picayune blurry, it's okay considering the next step is to apply shake correction.
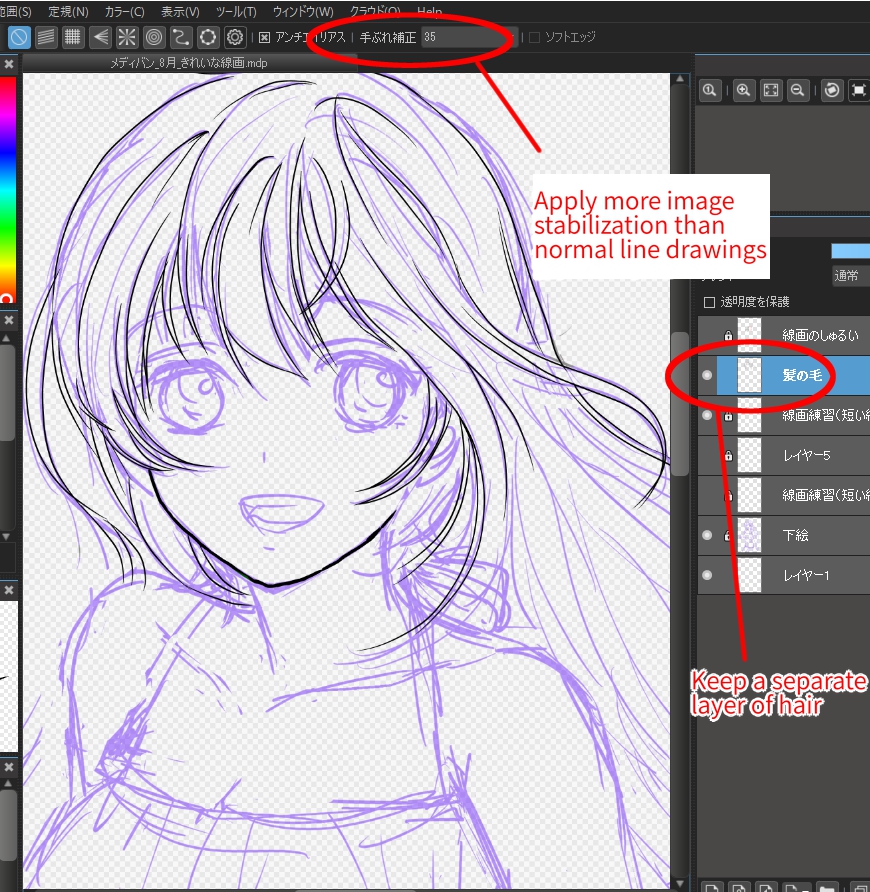
1-ii. Image Stabilization
Digital line drawings are more than likely to be shaky because they are drawn direct on a tablet.
Exist certain to utilize image stabilization.
Set the image stabilization here.
The higher the value, the stronger the correction.

In this case, I ready it to 25.
The higher the value of the stabilizer, the more it is automatically (and forcibly) corrected later you lot finish drawing the line, then it may not turn out the fashion yous want it to.
Also, if yous have a Bezier curve (a line drawn with a path. Lines of the same thickness can be drawn evenly. This is different from analog line drawings drawn by paw). The paradigm tends to await inorganic, like
If you experience that you want the stabilizer to be a little softer, or that yous desire more natural dissimilarity, or that you want the stabilizer to be more than automatic, change the pen tool or change the stabilization value to adapt the image stabilization value.
The post-obit article provides detailed information on prototype stabilization.
> Use Correction to depict beautiful lines!
Become to know your line drawing habits!
What kind of lines are y'all drawing on paper with a pencil or millimeter pen?
A: Single line, long strokes.
B: Tracing over and over once again, lots of overlapping lines.
C: Brusk lines are cut into small pieces and continued little by lilliputian to make a long line.
People with B and C may non be used to drawing lines in the beginning place.
It'south all-time to practice drawing lines a little every 24-hour interval, either on newspaper or on a tablet.
For people with B and C, drawing with a digital tool will right the lines, so they will be cleaner than when you draw on paper.
But even when cartoon digitally, it's better to draw a single line where information technology should be fatigued, so that the lines are smoother and more natural.
If you overlap or connect too many short lines, the natural momentum of the line is lost and the line tends to look unnatural.
As well, if you enlarge the image, you may see interruptions in the overlaps and connections.
Even if the lines look skilful on the monitor, they may show up when printed.
Cartoon a single line may not be your forte at first, but yous can improve it considerably with practice.
Get to know your line drawing habits and practice with your easily over and over again.
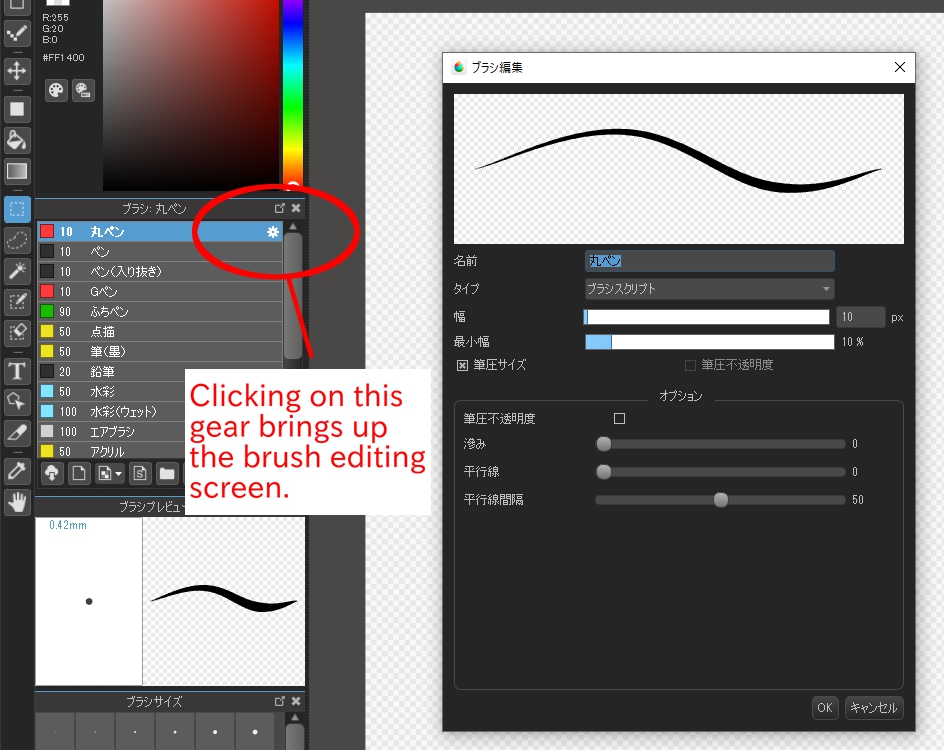
1-3. Adjust the pen tool in and out
The beginning and the end of a line is chosen "cutout".
When the bleed-through is turned on and off, there is a clear difference between the beginning and end of the line.
In Mediban Pigment, the Pen tool is the simply tool that comes standard with CropScape, simply you can also use the Round Pen and G Pen to add or remove padding as you similar.
Click the gear symbol that appears when y'all hover the cursor over the pen tool to open up the screen below.
The smaller the value for "Minimum Width", the thinner the bleed is, and the larger the value, the larger the drain.
I drew a line with each pen.
They are all set at 10px wide and 10px minimum width (the width of the pen in and out).
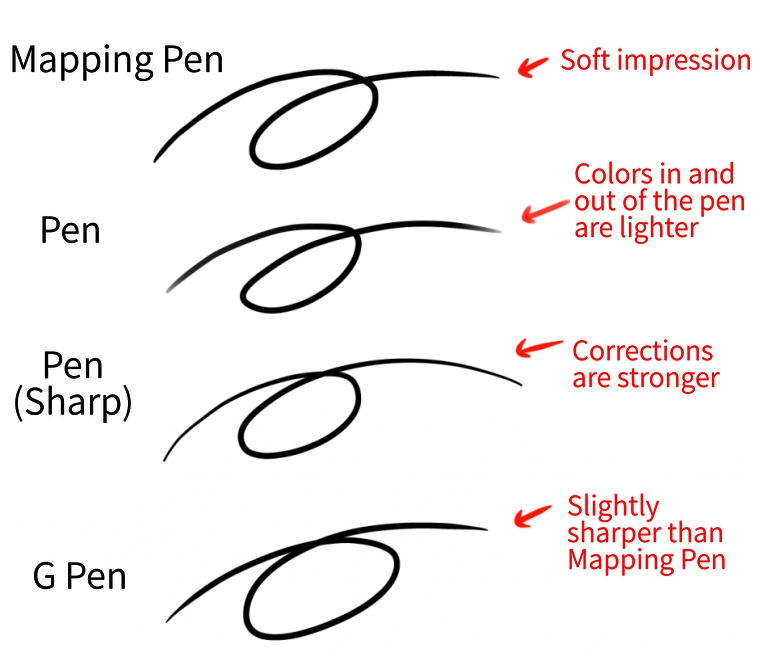
For this line drawing, I will mainly utilize a Thou-pen, and depending on the part (hair, optics, etc.) I will use a round pen.
I've decided on a pen tool specifically for line drawings.
Adjacent, let's depict with it.
Allow's describe a preliminary sketch with the pen we made (using the round pen).
This time, I will draw a B5 size, 600dpi, color mode canvas.
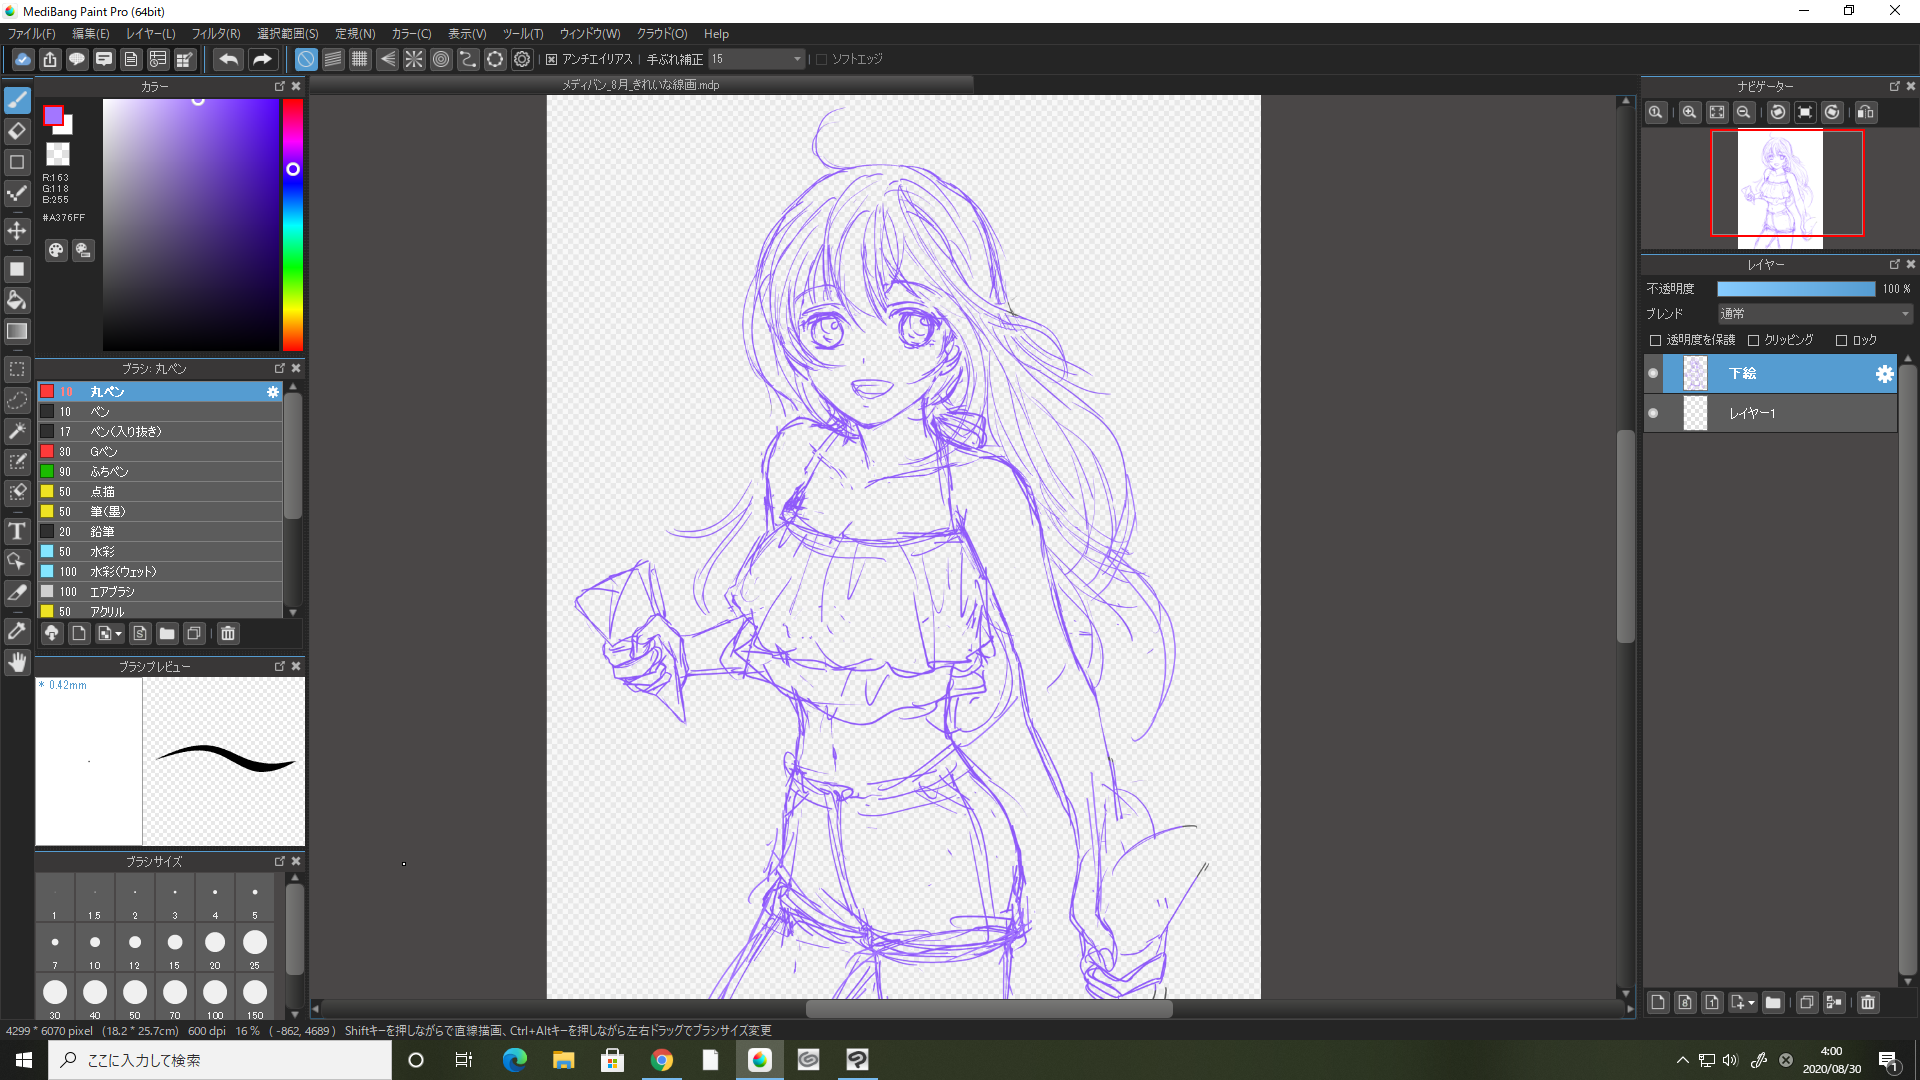
Information technology's still a crude sketch, so don't worry virtually the lines as I'll re-depict it nicely subsequently, merely let'south become some of the shape right.
2.[Working with magnification] Tips for making your line drawings wait nice
Be certain to zoom in and draw a line drawing.

I recommend working at 66% or more, preferably 100%.
When you've finished drawing the lines to a certain extent, shrink them to check the overall balance.
Repeat this process to complete the entire line drawing.
2-1. Connect the brusque lines
It'southward quite difficult for a beginner or someone who is not used to digital drawing to suddenly draw a make clean line with a single line.
Even so, it is possible to "describe short lines to make them expect nice".
I have tried drawing the outline of the character's face in five parts (I've inverse the colour to make it easier to come across).
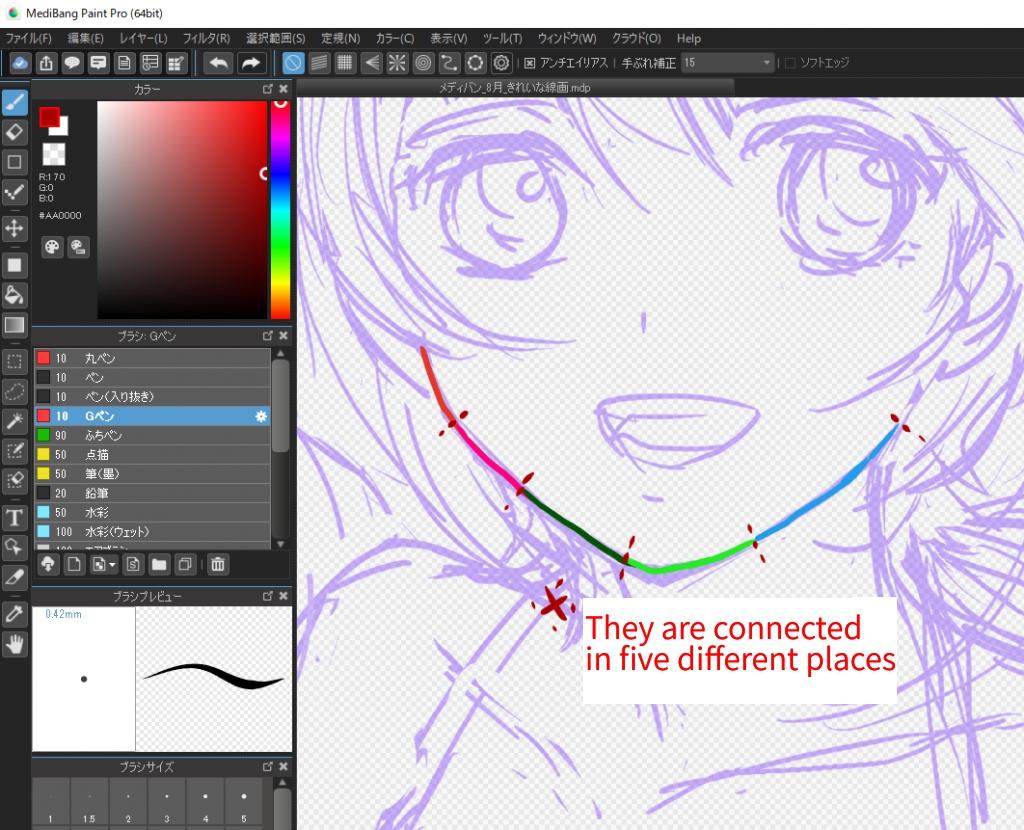
If you check the "Protect Transparency" box and then fill in the blackness and shrink it, you lot tin can meet ……
It turned out almost every bit proficient every bit if I had drawn a single line!
This method is very useful and tin be used by beginners as well as intermediate and to a higher place, so please practice it.
When you connect the lines, be sure to zoom in to nearly 100% and overlap the lines in and out neatly.
2-ii.Depict a single line
Parts that y'all want to create a natural momentum, such equally hair, look nicer when drawn in a single line.
Some people are able to draw relatively well if they move their elbows in a large way instead of using their wrists equally a fulcrum.
Different people have different habits, so try to actually draw the line as many times every bit you can to find your "own way" of cartoon it.
Hair is a great way to practice drawing a single line.
When you draw a hair line, zoom in or out on the screen and accept note of the residuum equally you draw it.
You tin too brand the lines smoother by using a slightly stronger shake correction.
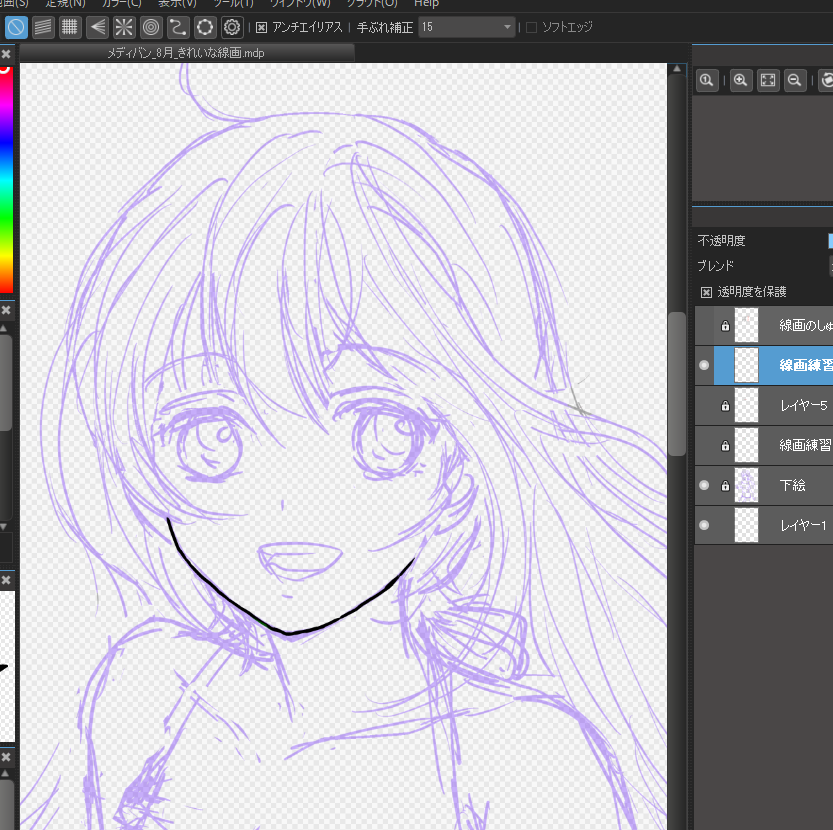
Separate the layers into parts!
When you're actually drawing a line drawing, you lot may want to revise it subsequently.
It'southward especially difficult to correct hair and clothing when they are overlaid on the person, and if y'all erase or depict them over and once again, even a well-drawn line may disappear.
And then let'south keep the layers divide for each part!
For instance, if you depict the person, the person'southward hair, the person's clothes, the optics, etc. in separate layers, it'southward very convenient considering you can calibration, erase or add together to the drawing after on in each function of the layer, and the other line drawings volition not be affected.
Once the drawing is divided, re-create the necessary layers at the end and merge the copies (it's safer to keep the split layers also, merely in example).
3. [Do clean lines] How to move your easily and describe lines
Here are some tips on how to draw cute lines.
I make a layer for line drawing on top of the rough sketch I accept fabricated earlier and draw more than and more than lines.
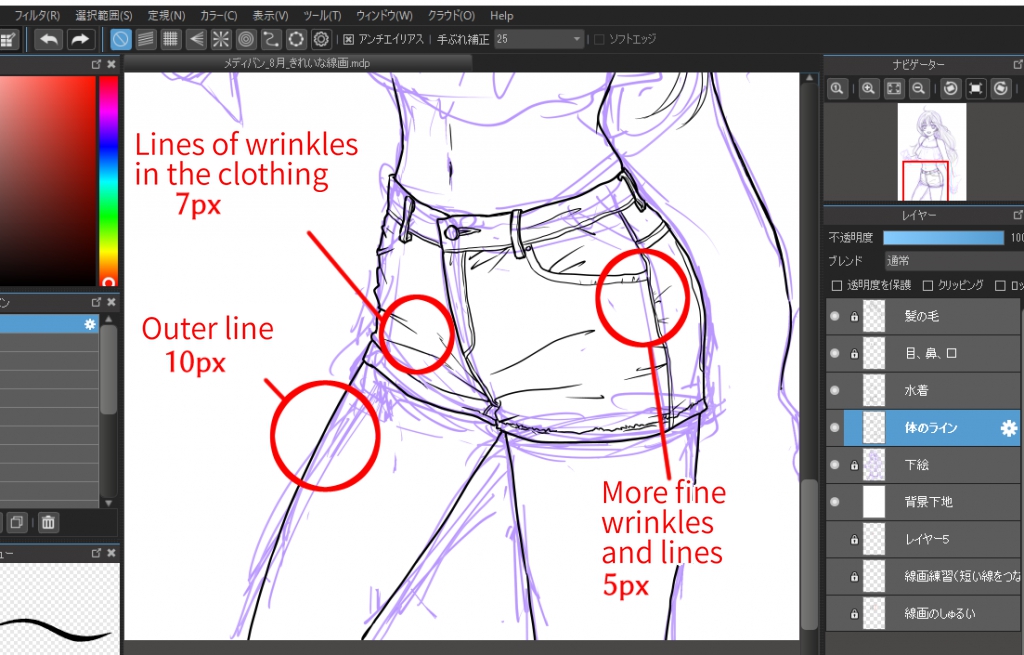
three-1. Use different lines for each function
Use different thicknesses of lines for dissimilar areas, such as the contours of the face up, the trunk, the wrinkles in the clothing, and the expression of the eyes.
For example, utilize a G-pen for the main line cartoon, utilize a round pen for the wrinkles in your clothes, hair and center details, and so on.
Of course, you can likewise use the same pen, but with a different thickness.
Of course, y'all can use the aforementioned pen with different thicknesses.
3-2. Describe a line with the length of the scroll in heed
Draw a short line and a long line.
For example, as we did in Chapter 2.
'The hair is highly compensated and fatigued with a single line and a large hand movement.'
Brusk lines of particular, magnified and carefully pieced together.
Echo this procedure to create a clean line drawing.
3-3. Make clean up overflowing lines
In society to merge the line drawings fatigued separately in layers into one picture, I erased the overflowing parts with an eraser.
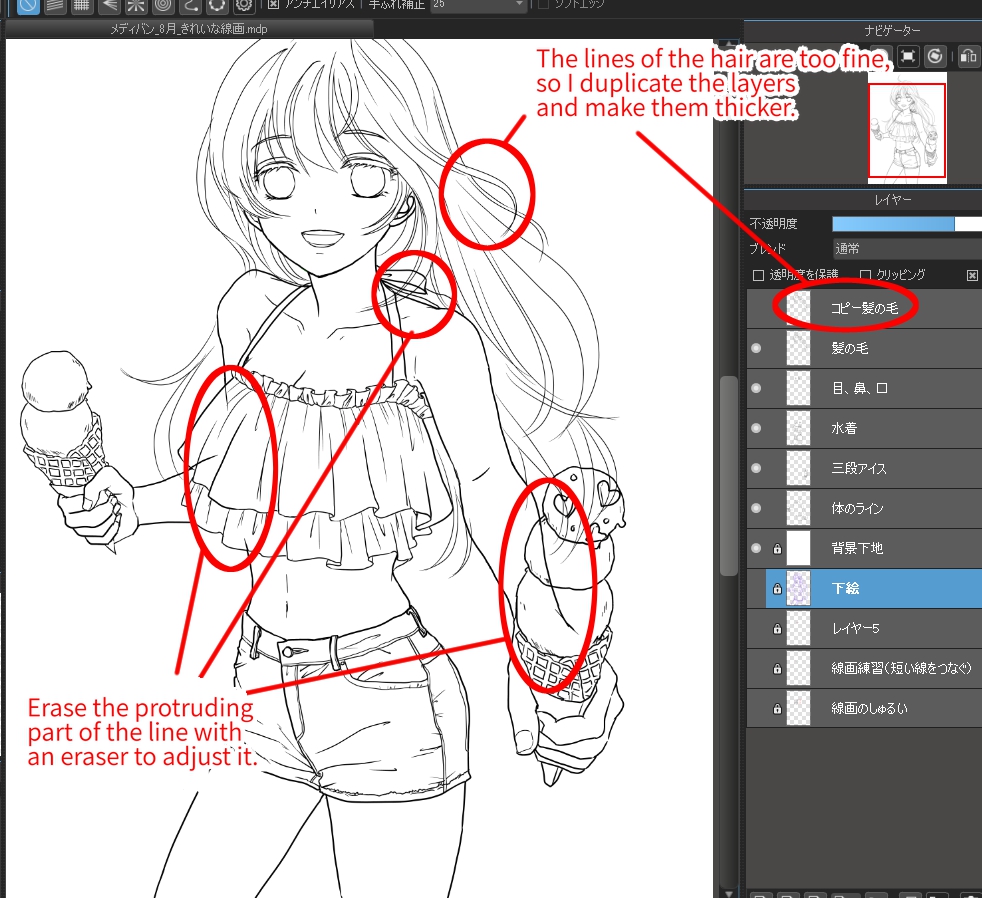
Since the hair was besides thin in the lines throughout, duplicate the pilus layers and layer them on top of each other, erasing only the areas y'all want to exit sparse and well-baked with an eraser (practice not join the layers together).
This method is useful if you want to make the line drawing thicker and darker.
Use a fine pen to depict in the details, such every bit the inside of the optics, to consummate the movie.
(*If you make a color illustration later, do not draw the inside of the optics with line drawings)
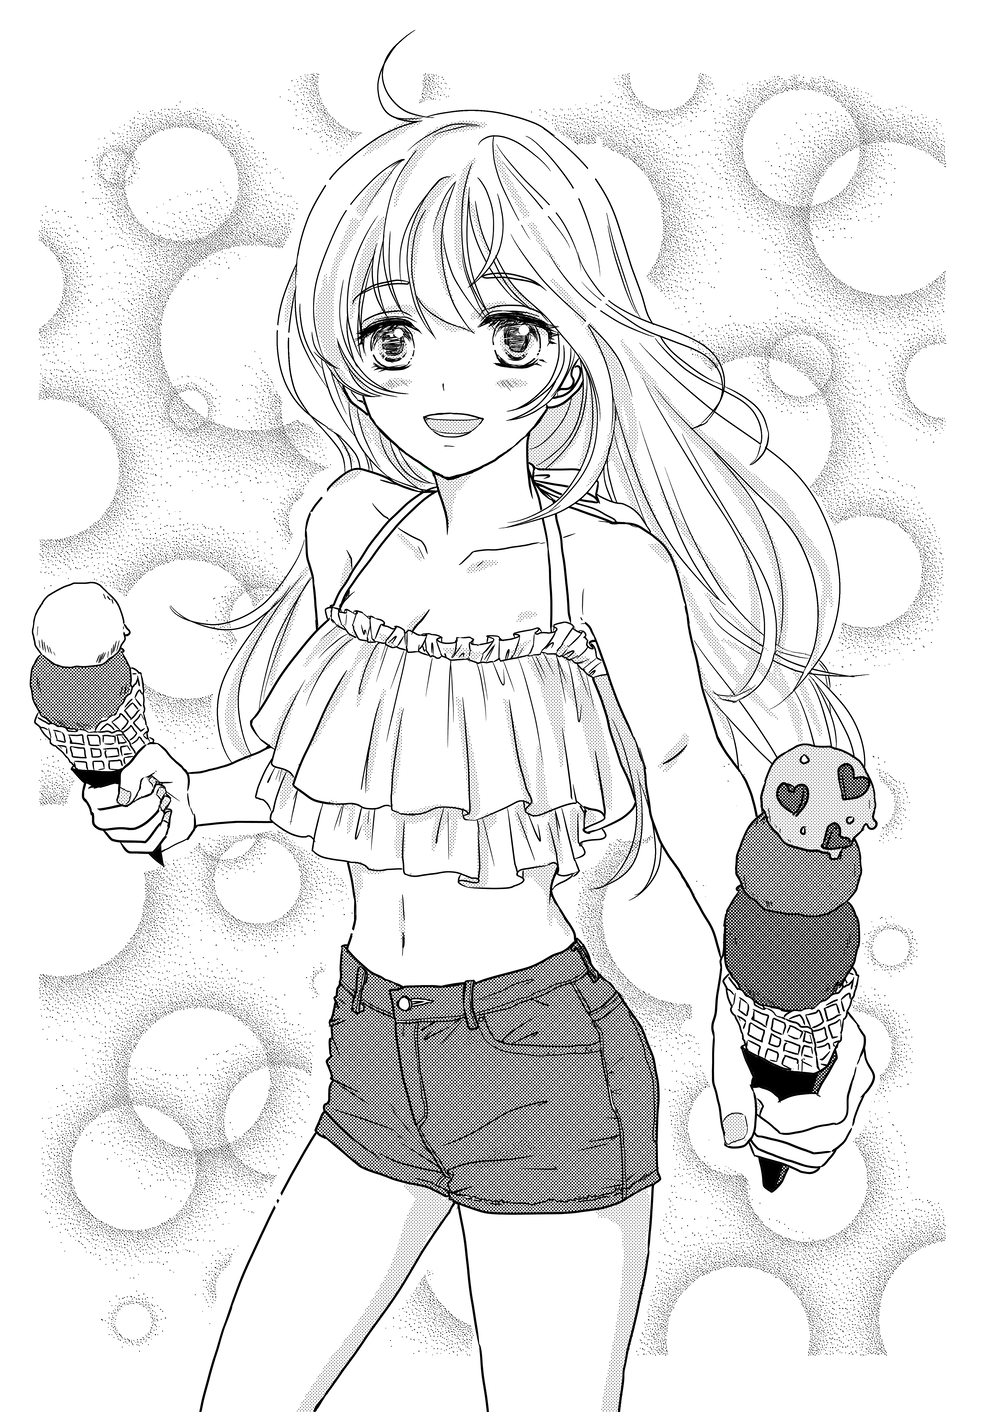
[This is the finished line drawing]
*If you tone information technology, it becomes an illustration at the offset.

Apply "ctrl+z"!
Information technology'south a hassle to click the "dorsum" arrow every time you can't draw a line the way you want to.
By cartoon a line with your right hand pen and if y'all fail, you can smoothly become dorsum to the previous step and redraw it by "pressing ctrl + z" with your left hand (or vice versa if yous are left-handed).
This combination of keys that perform a specific activity is called a "shortcut central".
(On a Mac, some key names and combinations are dissimilar, but the shortcut keys are more often than not like.
There are a diverseness of other shortcut keys as well, and so it's useful to learn them little by little.
Summary
What did yous think?
In this article, we've discussed "How to describe a clean line drawing".
In lodge to draw a clean line cartoon with a digital tool like Mediban Pigment, you need to
(1) Know the functions of the app, such as Milk shake Reduction, and accommodate it to suit your needs.
(2) Enlarge the prototype and work on information technology (besides bank check the overall balance by shrinking it during the process).
(3) Do your "hands" on a daily ground so that y'all can draw the line where you want it to exist.
When you can draw a clean line drawing, information technology'southward easier to cascade buckets of tone and colour into information technology.
We hope these tips will help you improve your illustrations.
Please refer to the following article for adjustment of pouring.
> "How to use "Close Gaps"
If you want to add together more definition to your line drawings after, please refer to the tips here.
>"The 3-stride line drawing quality improvement technique in five minutes!
However, if you use this method, it is recommended to use a different layer simply in case.
Source: https://medibangpaint.com/en/use/2020/11/how-to-draw-smooth-lines/
0 Response to "Get Used to Drawing Thin Lines in Digital Art"
Post a Comment